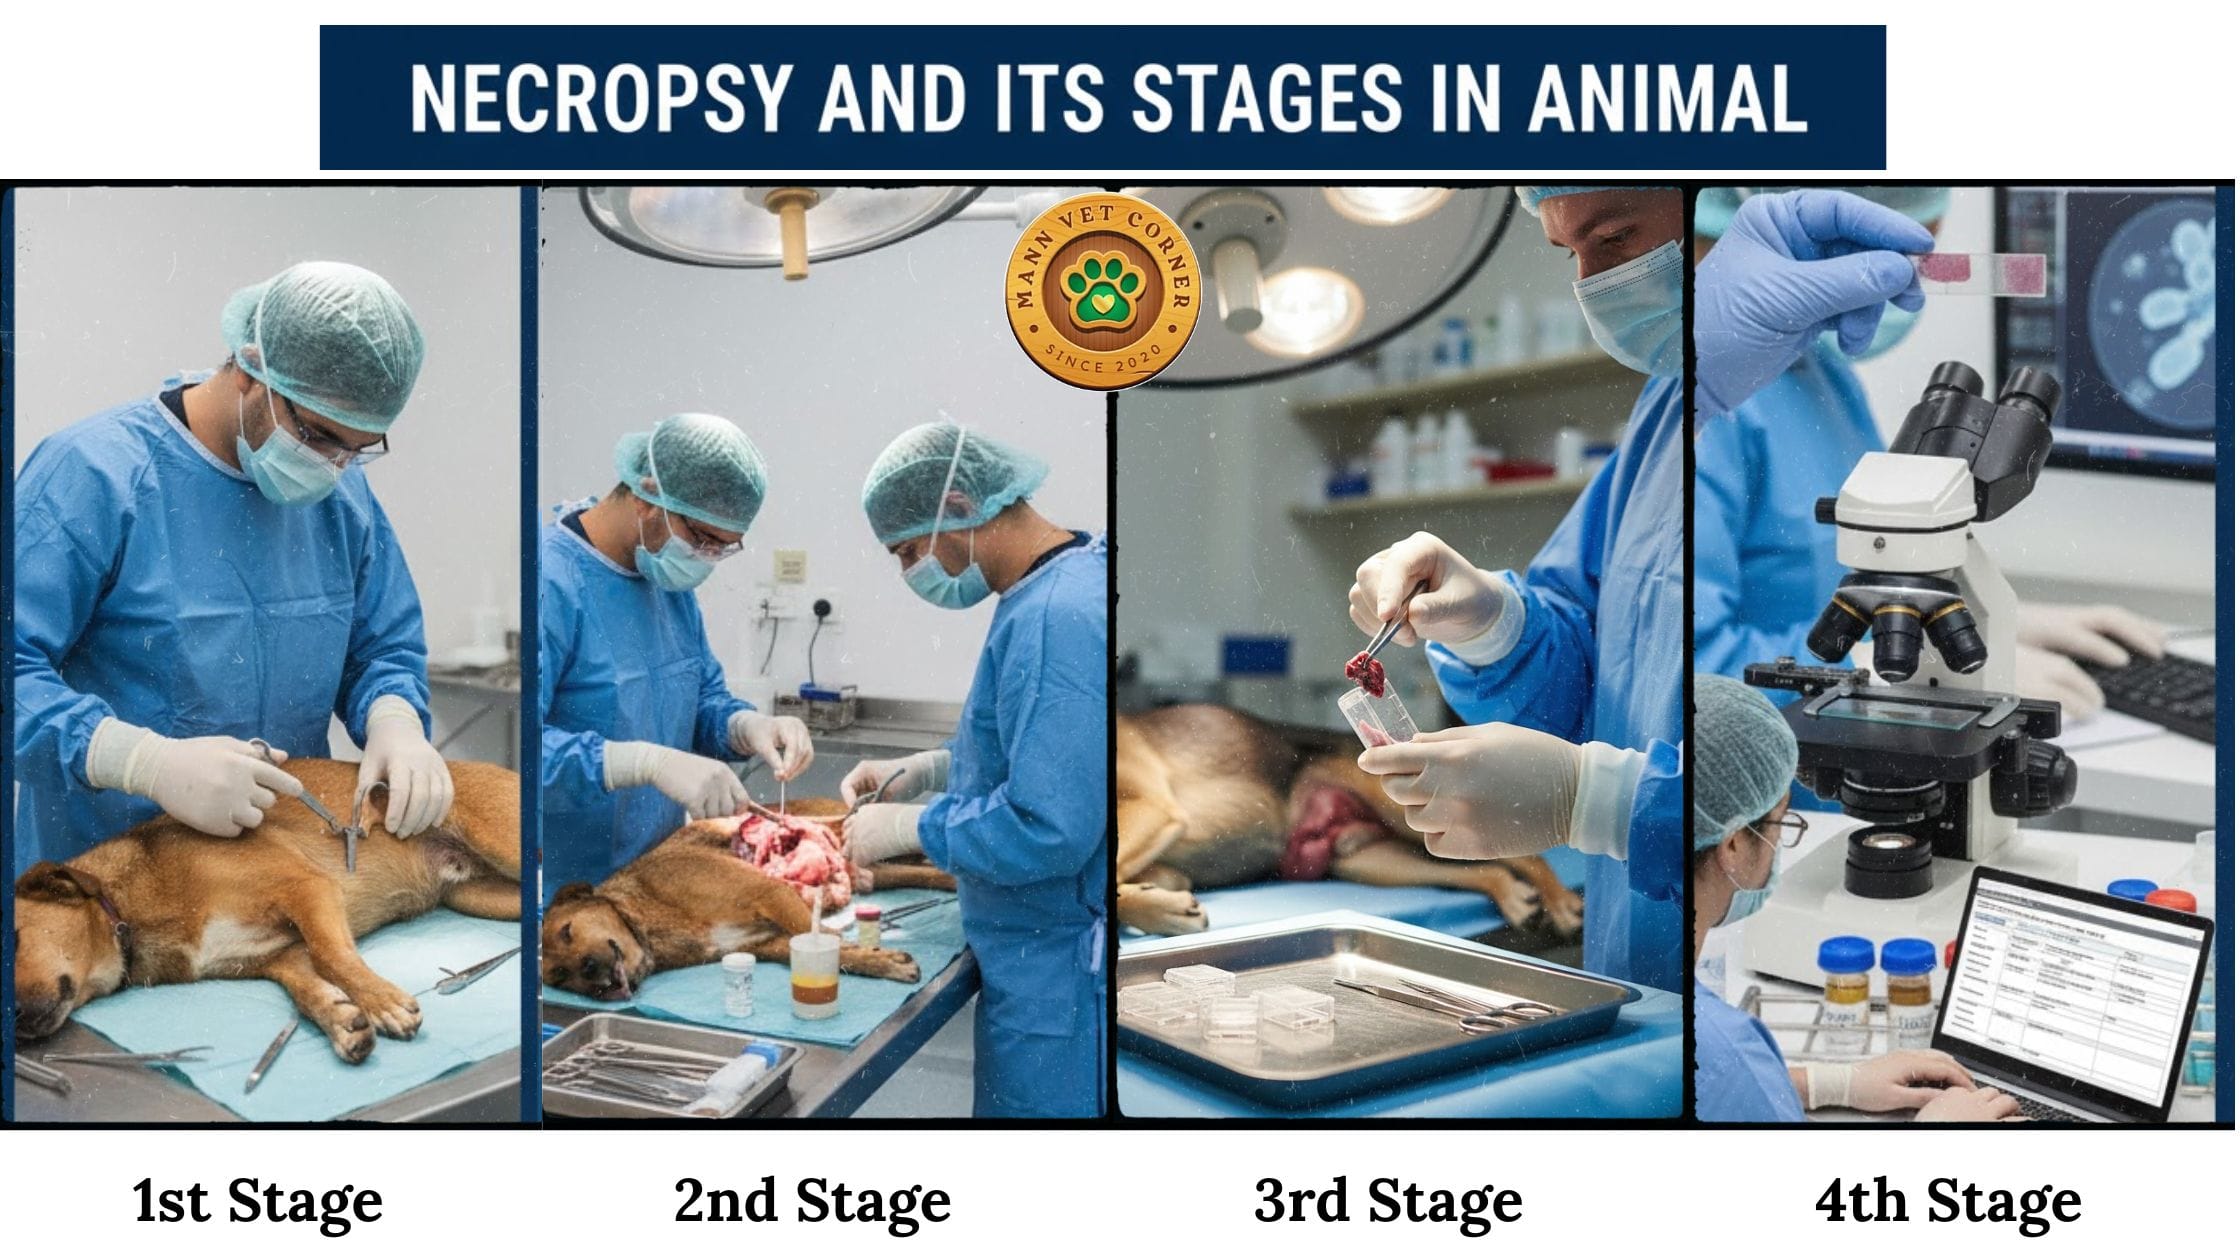
Most people picture necropsy as nothing more than cutting open a dead animal. In reality, a complete necropsy follows a rigorous, four-stage scientific process; one that transforms a carcass into a detailed medical story. A necropsy (also known as a post-mortem exam or autopsy in humans) is the systematic dissection and examination of an animal carcass to determine the cause of death, diagnose diseases, or study pathological changes. It involves a methodical, standard, and repeatable approach to ensure all organs are examined for lesions. A high-quality necropsy follows four key stages, generally consisting of preparation and external examination, internal examination (in situ), organ removal/sampling and conclusion and finalize necropsy report.
This guide explains every stage in depth, helping owners, students, veterinarians, and researchers understand exactly what happens from the moment the examination begins to the moment a pathologist signs the final report.
What Is Necropsy? A Quick Overview
A necropsy — derived from the Greek words nekros (dead) and opsis (sight) — is the systematic, post-mortem examination of an animal body. Veterinary pathologists perform necropsies to determine cause of death, identify disease processes, gather forensic evidence, and contribute to scientific research. People often call it an “animal autopsy,” though the veterinary community reserves the term “necropsy” specifically for non-human subjects.
Most people consider necropsy as just the gross dissection of a carcass — the cutting, opening, and visual inspection of the body. That assumption is understandable, because dissection is the most dramatic and visible part of the process. However, a complete necropsy covers far more than the moment of dissection. Veterinary pathologists divide the full procedure into four distinct stages, each with its own purpose, techniques, and standards of practice.
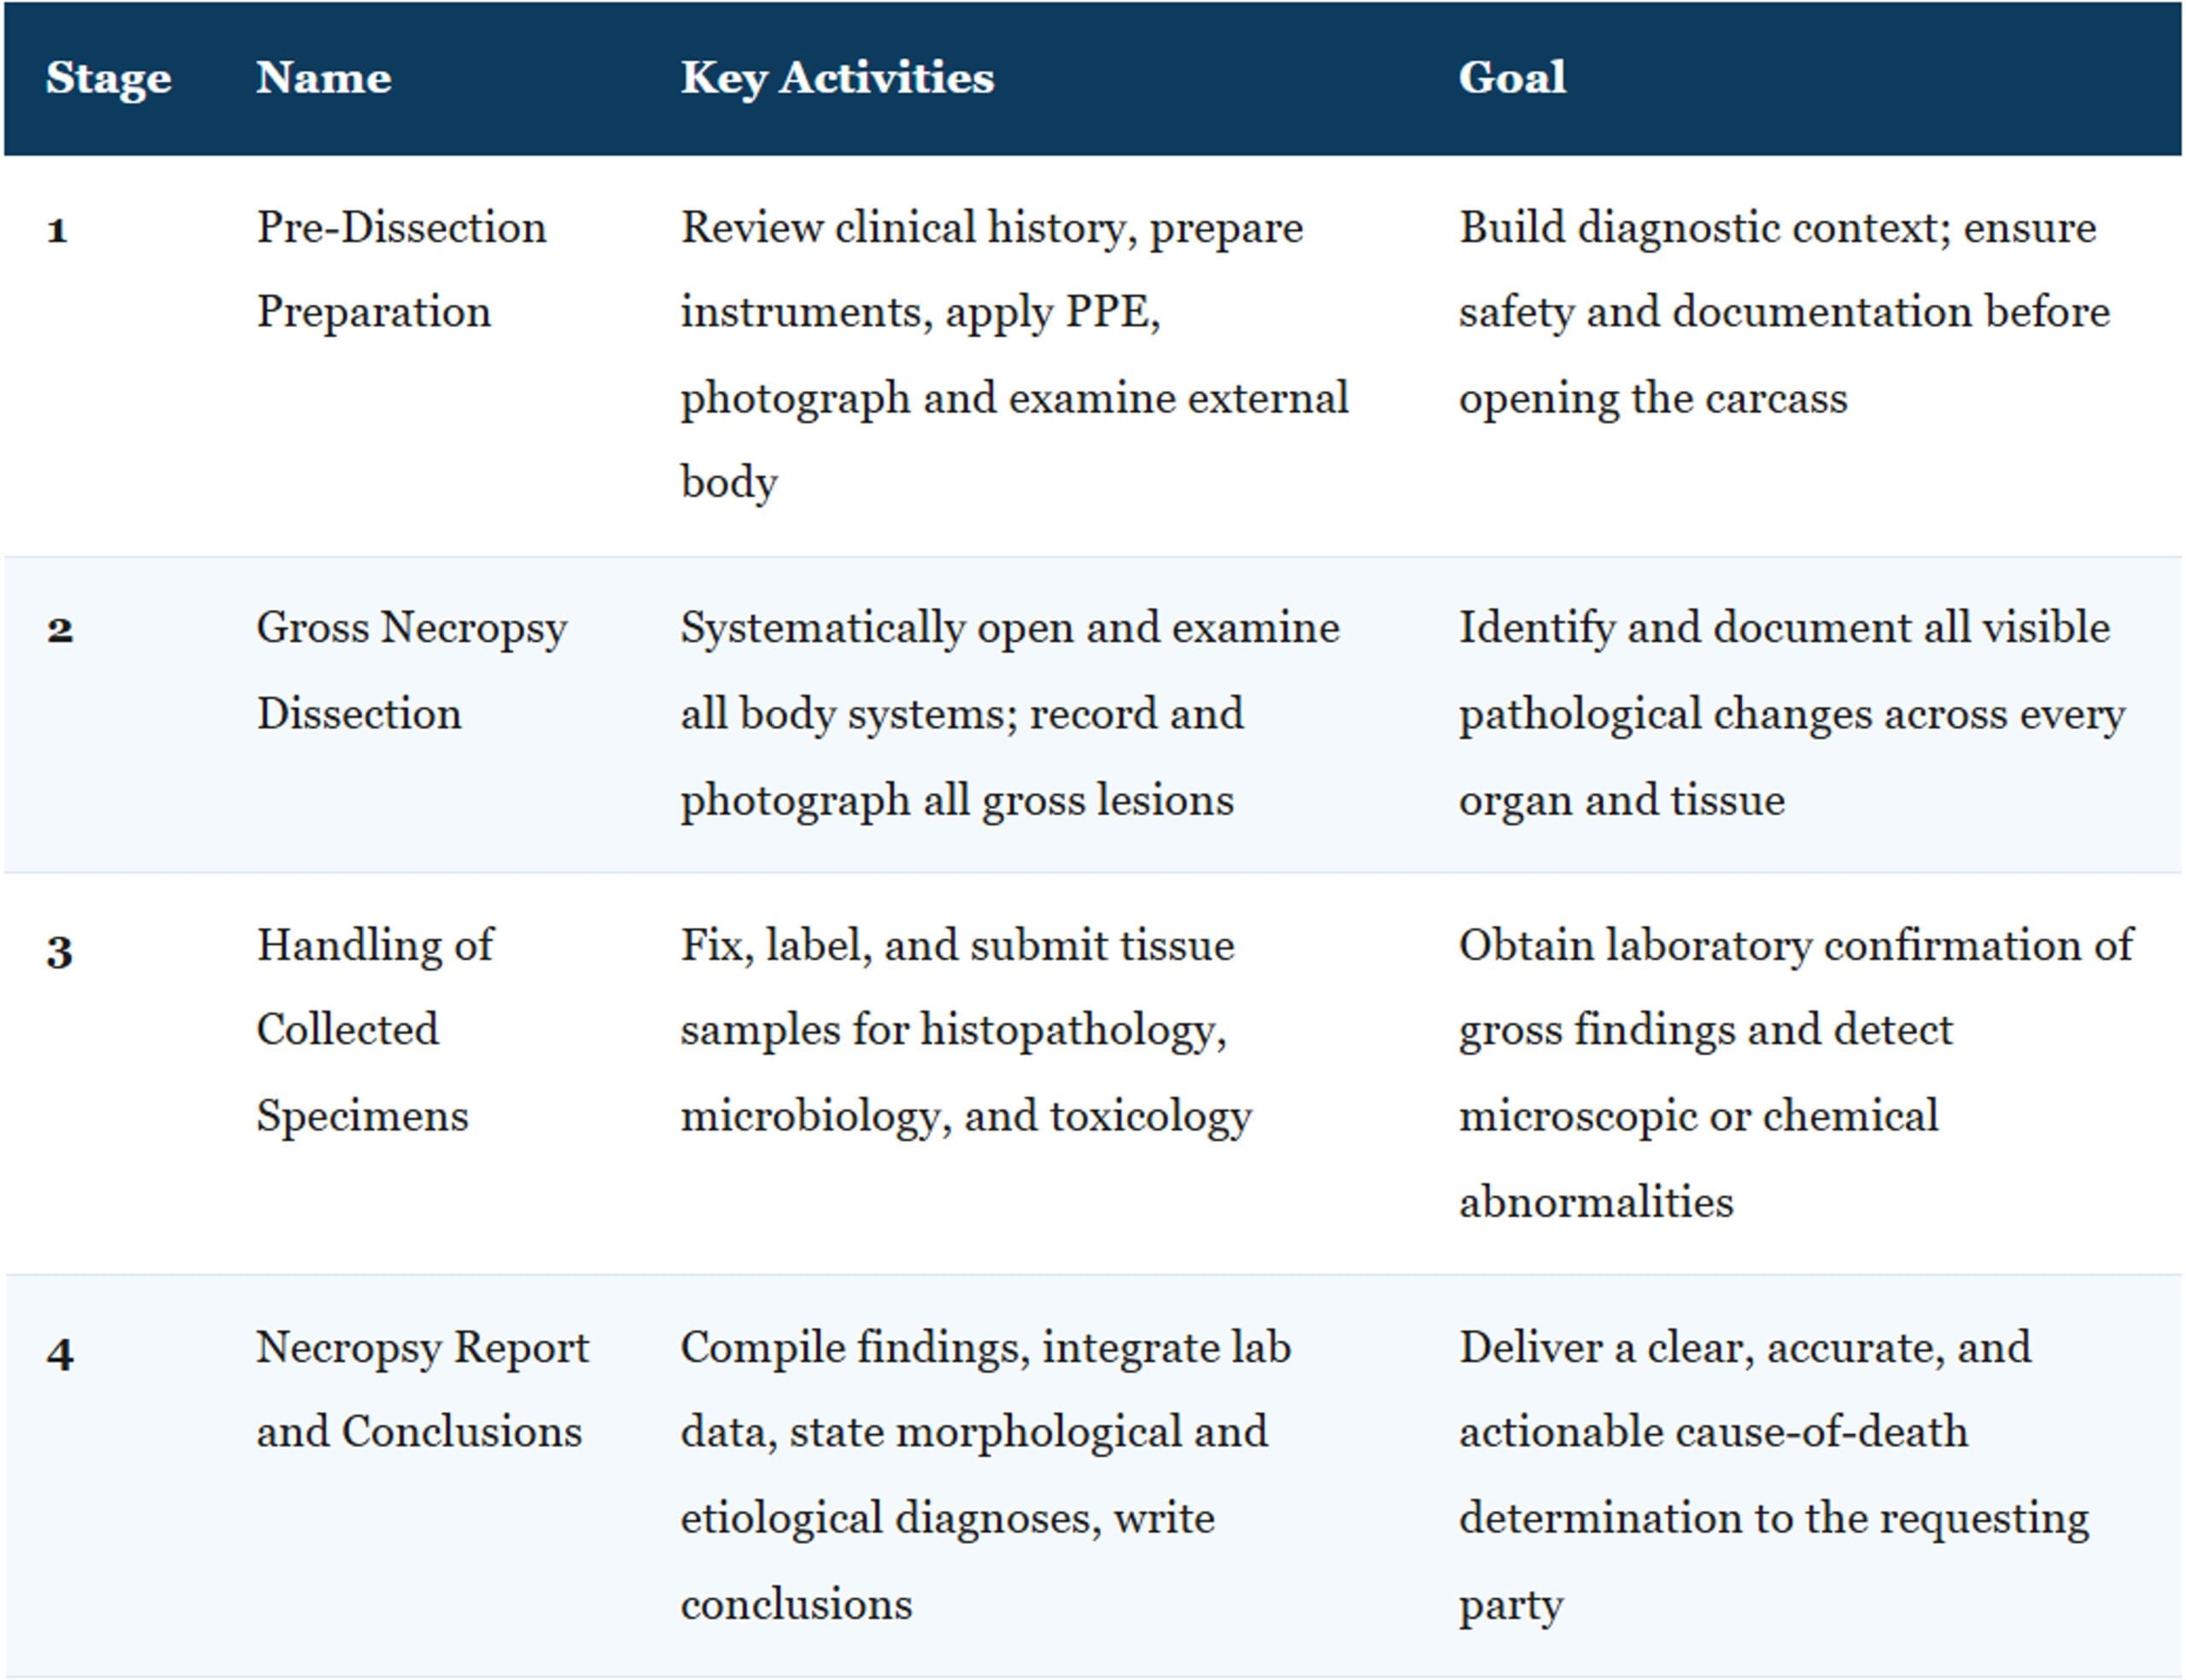
The 4 Stages of Necropsy at a Glance
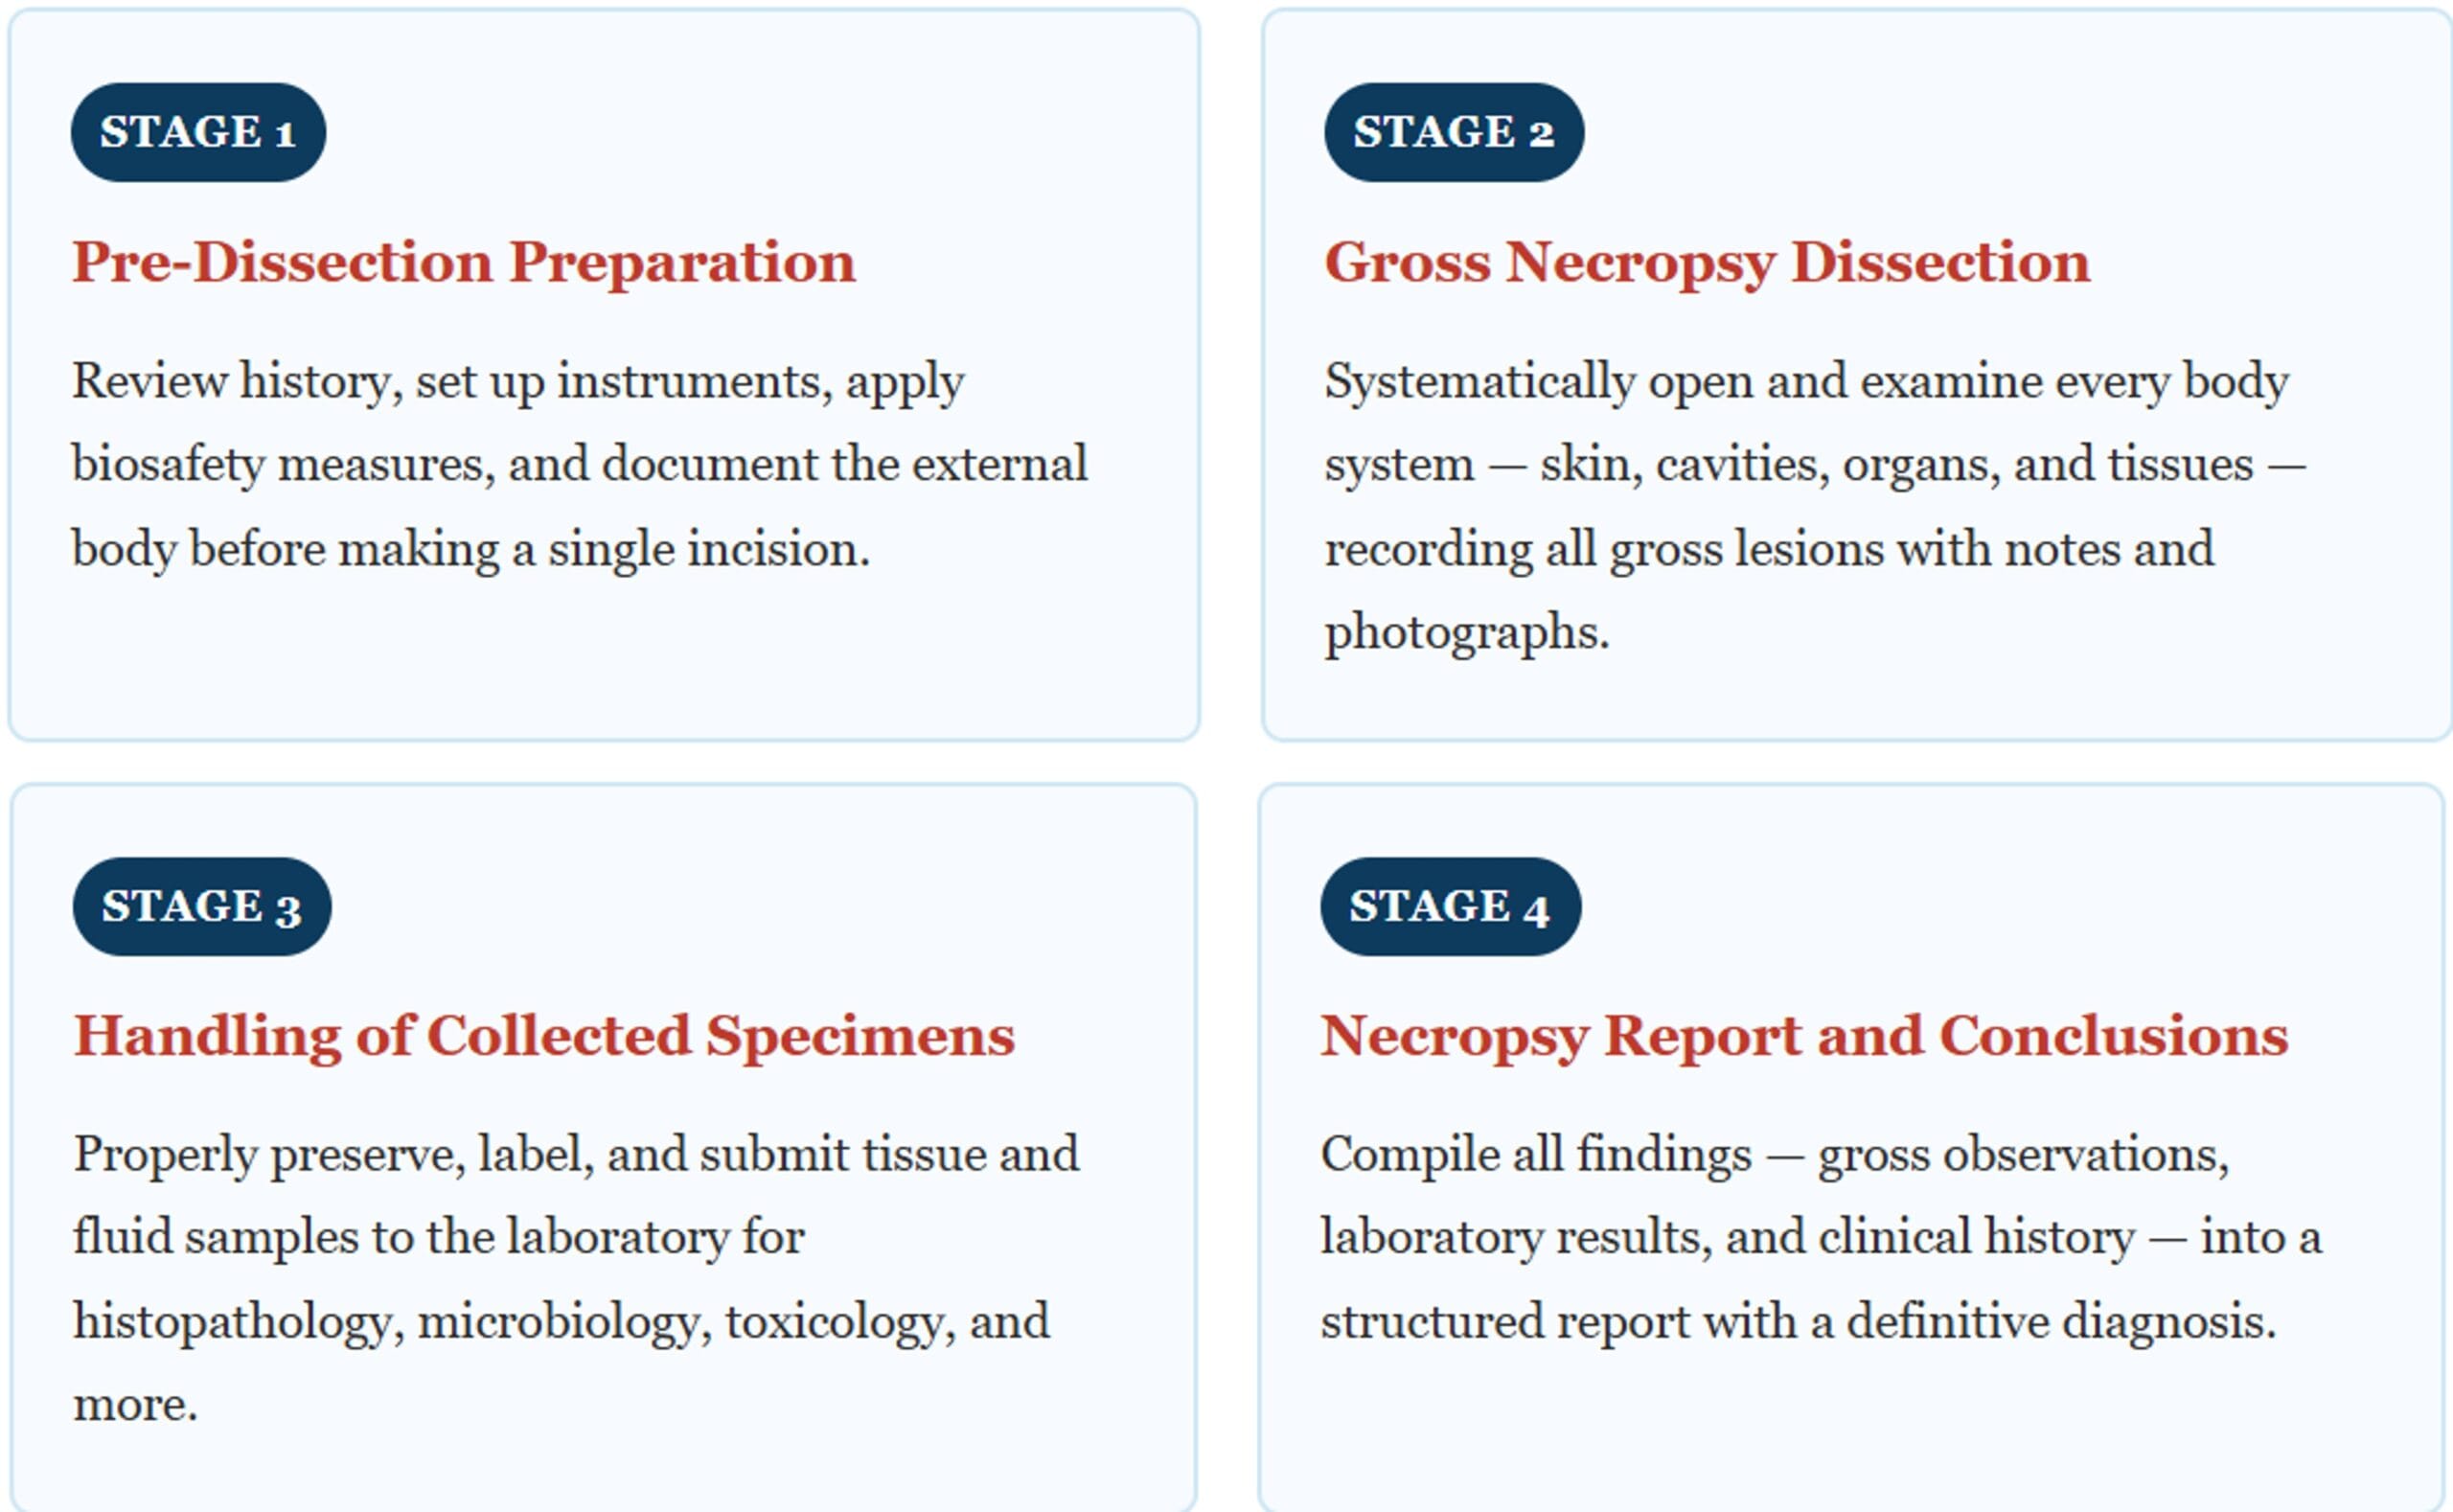
Stage 1: Pre-Dissection Preparation
The first stage of necropsy sets the foundation for everything that follows. No skilled pathologist opens a body without first preparing thoroughly — because what a veterinarian knows before picking up a scalpel shapes every interpretation they make afterward.
Gathering and Reviewing the Clinical History
Every necropsy begins with a careful review of the animal’s signalment and clinical background. The pathologist collects and studies the species, breed, age, sex, and reproductive status of the animal. They then read through the clinical records — vaccination history, previous illnesses, medications, feed and water sources, housing environment, and the timeline of symptoms leading up to death. This background knowledge forms a diagnostic framework that guides the entire examination.
For example, a young dog that died suddenly after exhibiting bloody diarrhea prompts the pathologist to look closely at the gastrointestinal tract for hemorrhagic lesions consistent with parvovirus — an informed starting point that a pathologist without the clinical history would lack entirely.
Setting Up the Workspace and Instruments
Before the examination begins, the pathologist prepares a clean, well-lit necropsy table. They lay out and sterilize all necessary instruments: scalpel handles and blades, bone saw, rib cutters, forceps, scissors, probes, and organ knives. Containers for specimen collection — including formalin jars for histopathology, sterile swabs for microbiology, and sealed tubes for toxicology — stand ready on the workbench.
Having everything prepared before opening the body prevents delays, reduces contamination risk, and ensures the pathologist never needs to stop mid-examination to retrieve a forgotten tool.
Applying Biosafety and Personal Protective Equipment
Biosafety is non-negotiable at the necropsy table. Depending on the species and the suspected cause of death, the pathologist and all assisting staff must wear appropriate personal protective equipment (PPE). At a minimum, this includes gloves, a waterproof apron, eye protection, and a mask. When the case involves a suspected zoonotic disease — such as rabies, brucellosis, or leptospirosis — the team escalates PPE accordingly, sometimes adding full face shields, respirators, and double gloves.
Biosafety protocols also include controlling access to the necropsy area and properly disposing of all waste materials in compliance with local regulations.
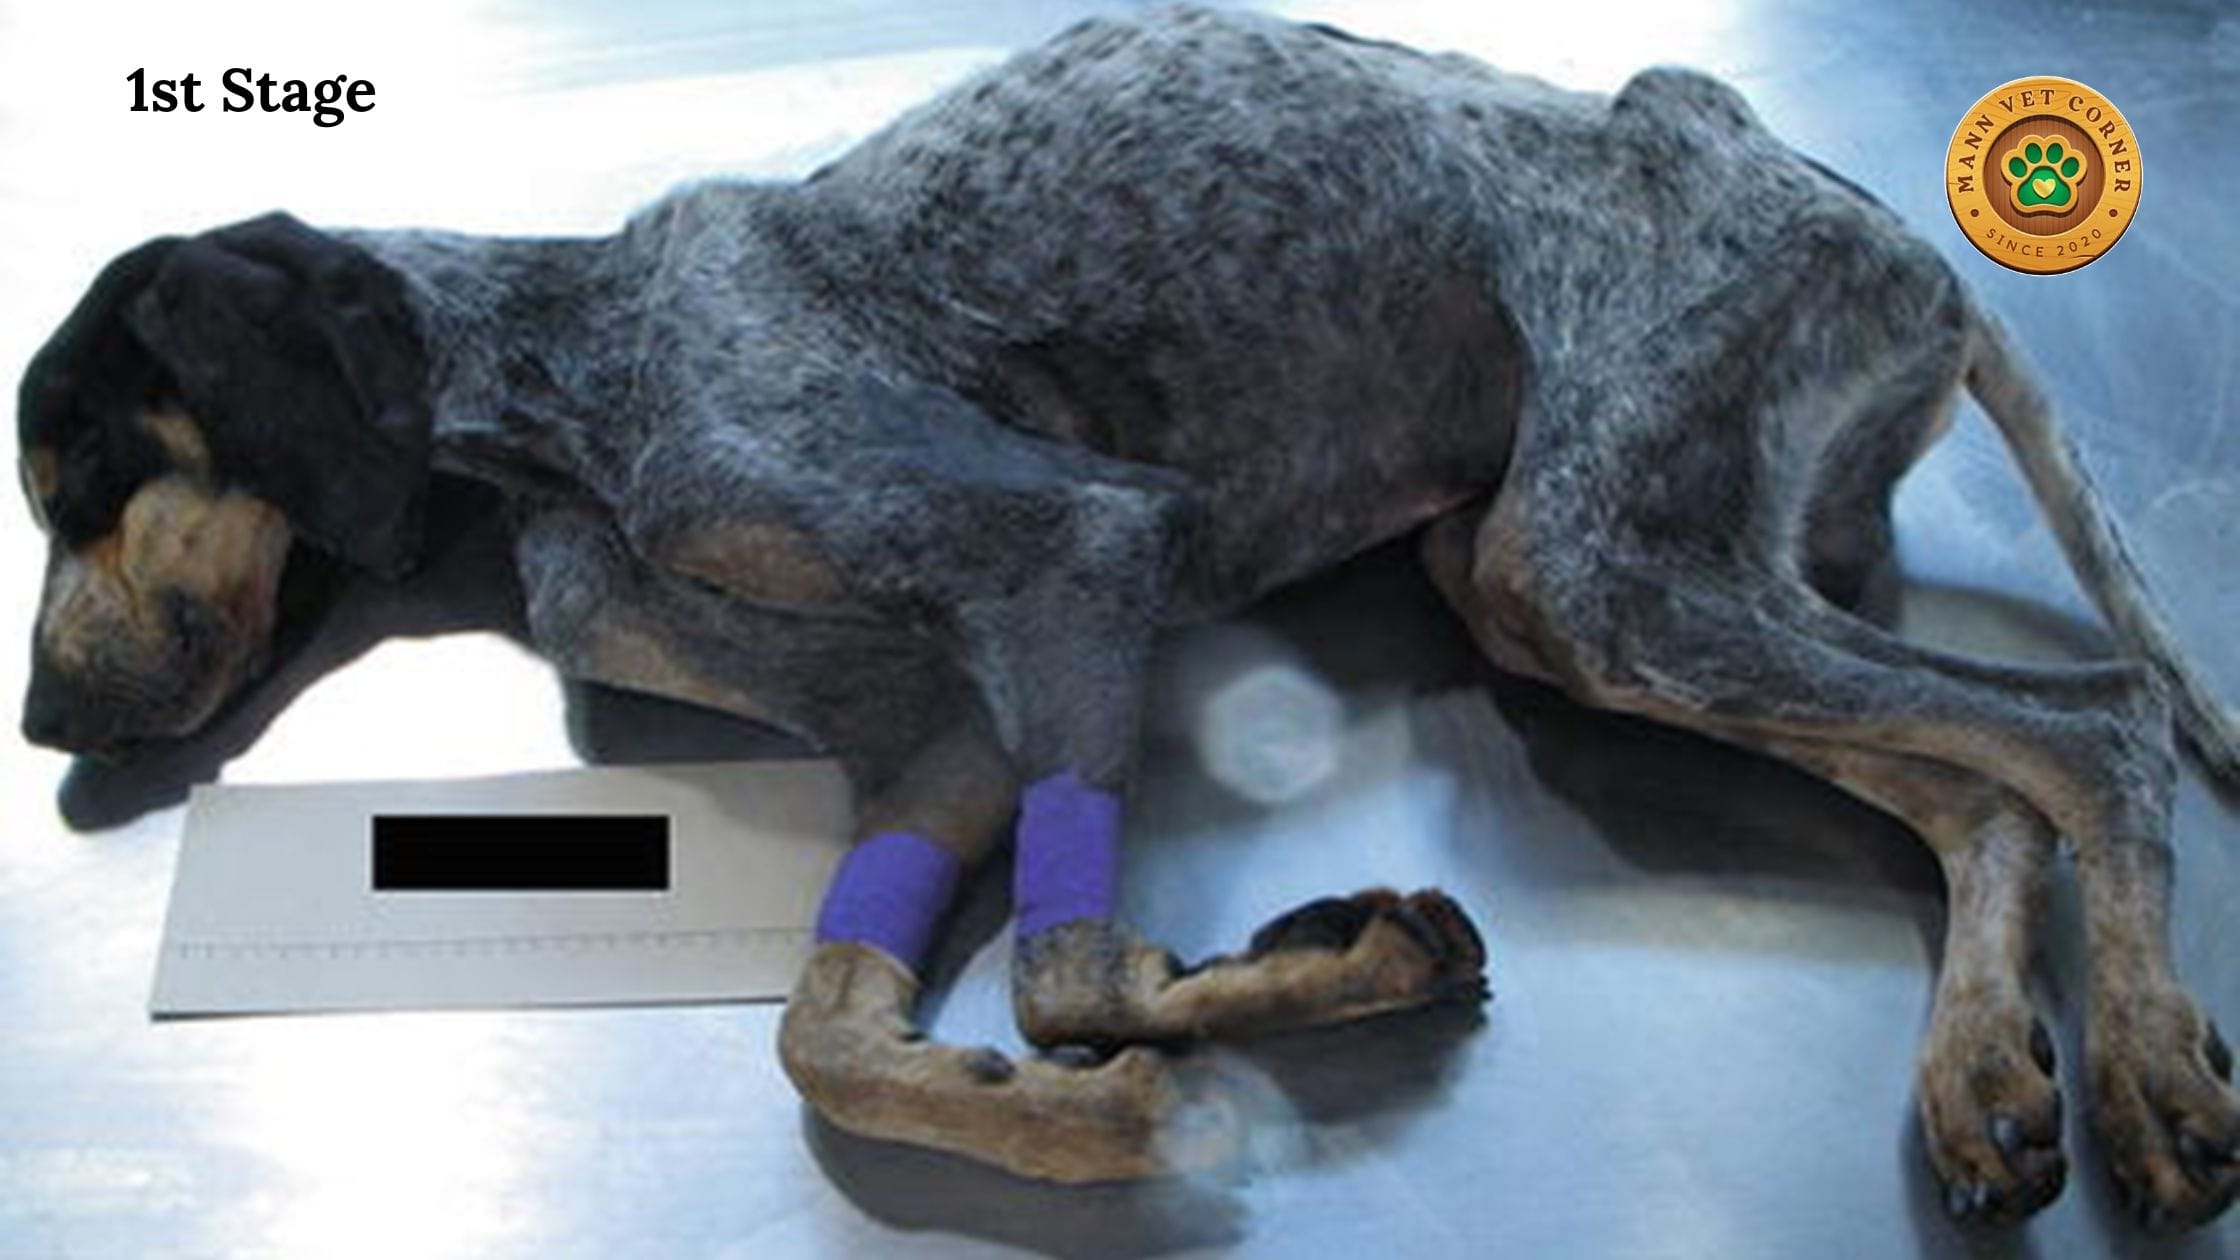
External Examination and Photographic Documentation
Before the pathologist makes any incision, they perform a thorough external examination of the intact carcass. They record the body weight and condition score, note the state of rigor mortis and decomposition, and carefully inspect every external surface — the skin, coat or feathers, eyes, ears, nostrils, mouth, limbs, hooves or paws, and all natural body openings.
Pathologists photograph the animal from multiple angles at this stage, capturing the overall appearance and any visible external lesions. This photographic record proves invaluable later, especially in forensic cases where legal proceedings may rely on documented evidence of external injuries.
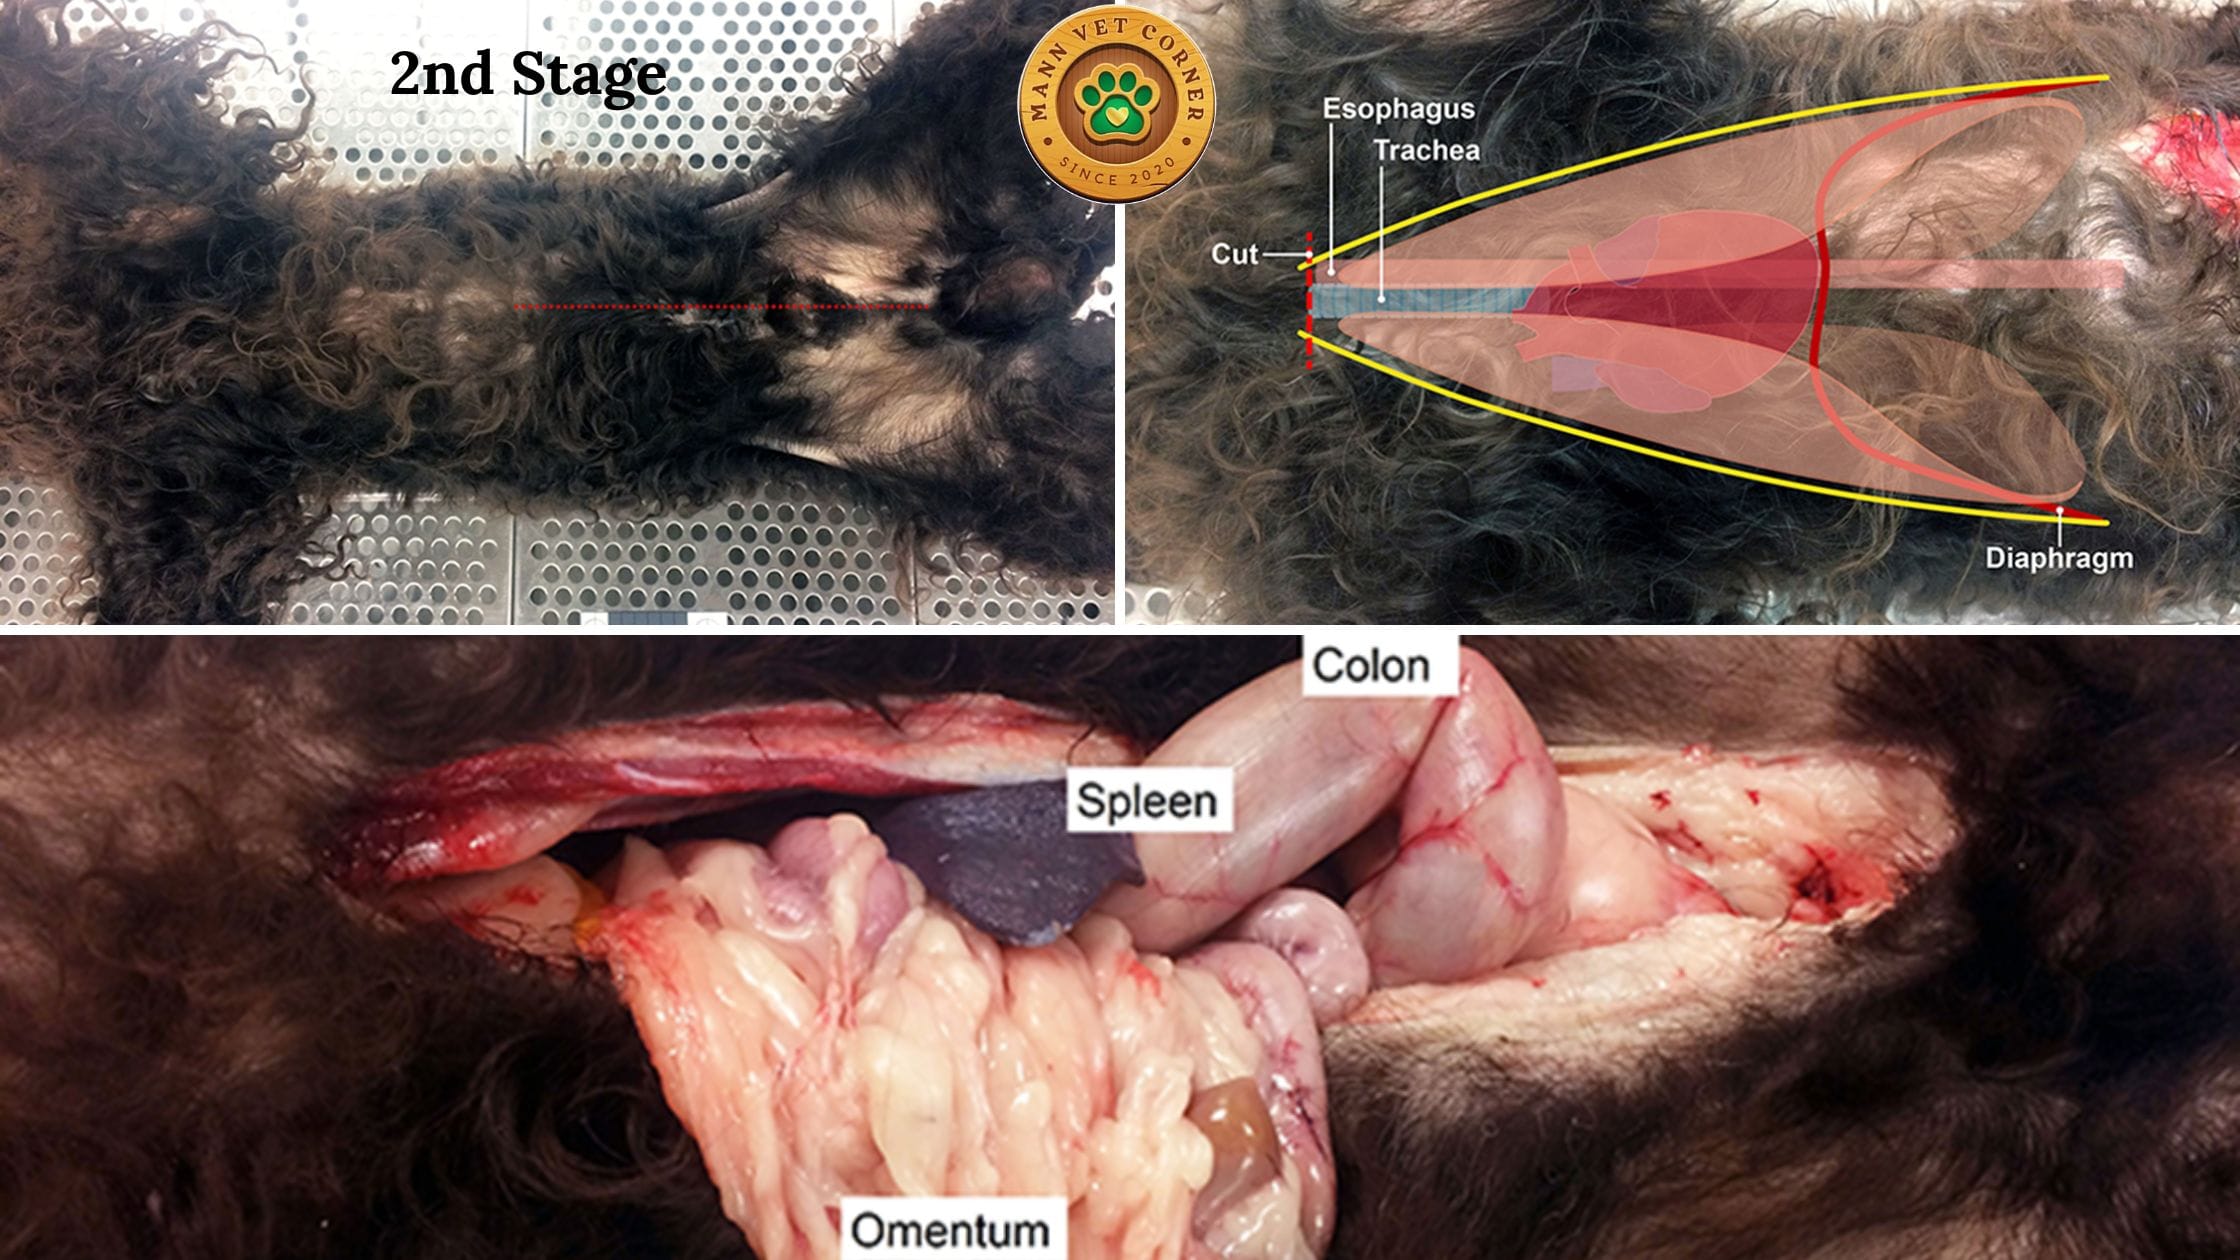
Stage 2: Gross Necropsy Dissection
Stage two is the heart of the necropsy — the hands-on, systematic examination that most people picture when they hear the word. Here, the pathologist opens the carcass and evaluates every organ and body system with eyes, hands, and instruments, recording abnormalities as they go.
What “Gross” Means in Gross Dissection
The word “gross” does not refer to anything unpleasant. In pathology, “gross examination” means macroscopic examination — the evaluation of structures visible to the naked eye, without magnification. The pathologist looks at size, shape, color, texture, consistency, and odor of each organ and tissue. Only later, at the laboratory, does microscopic examination take over.
The Systematic Dissection Approach
A hallmark of quality gross dissection is systematic consistency. Pathologists follow a defined sequence — most commonly beginning with the external surfaces and proceeding inward — so they never overlook a body system regardless of where the most obvious abnormality appears. The typical dissection sequence for a mammal moves through these areas in order.
First, the pathologist opens the subcutaneous tissues and evaluates the musculature and lymph nodes. Next, they enter the abdominal cavity, examining the abdominal organs: liver, spleen, kidneys, adrenal glands, gastrointestinal tract, pancreas, and reproductive organs. They note the position, color, size, and surface appearance of each organ before sectioning it to examine the internal architecture.
The pathologist then opens the thoracic cavity after cutting the ribs. Here, they evaluate the lungs, heart, great vessels, esophagus, trachea, and thymus. They examine the lungs for color, texture, and whether they float or sink in water — a simple but informative test. Then open the heart, measure wall thickness, and inspect the valves and coronary vessels. They then examine the head: the oral cavity, nasal passages, eyes, ears, and brain. Finally, they open the vertebral canal to examine the spinal cord.
Recording Gross Findings
Throughout the dissection, the pathologist records every abnormal finding in precise descriptive language. A good gross description captures six key attributes of any lesion: location, distribution, color, size, shape, and consistency. Rather than writing “the liver looks bad,” a skilled pathologist writes “the liver shows multifocal, randomly distributed, pale yellow foci ranging from 1 to 3 mm in diameter on the capsular surface and cut surface, with soft consistency.” This precision ensures the written record communicates clearly to anyone who reads it — including a courtroom judge or a specialist reviewing the case remotely.
Photography continues throughout this stage. The pathologist photographs each organ before and after sectioning, capturing close-up images of all gross lesions with a ruler or scale bar in the frame for size reference.

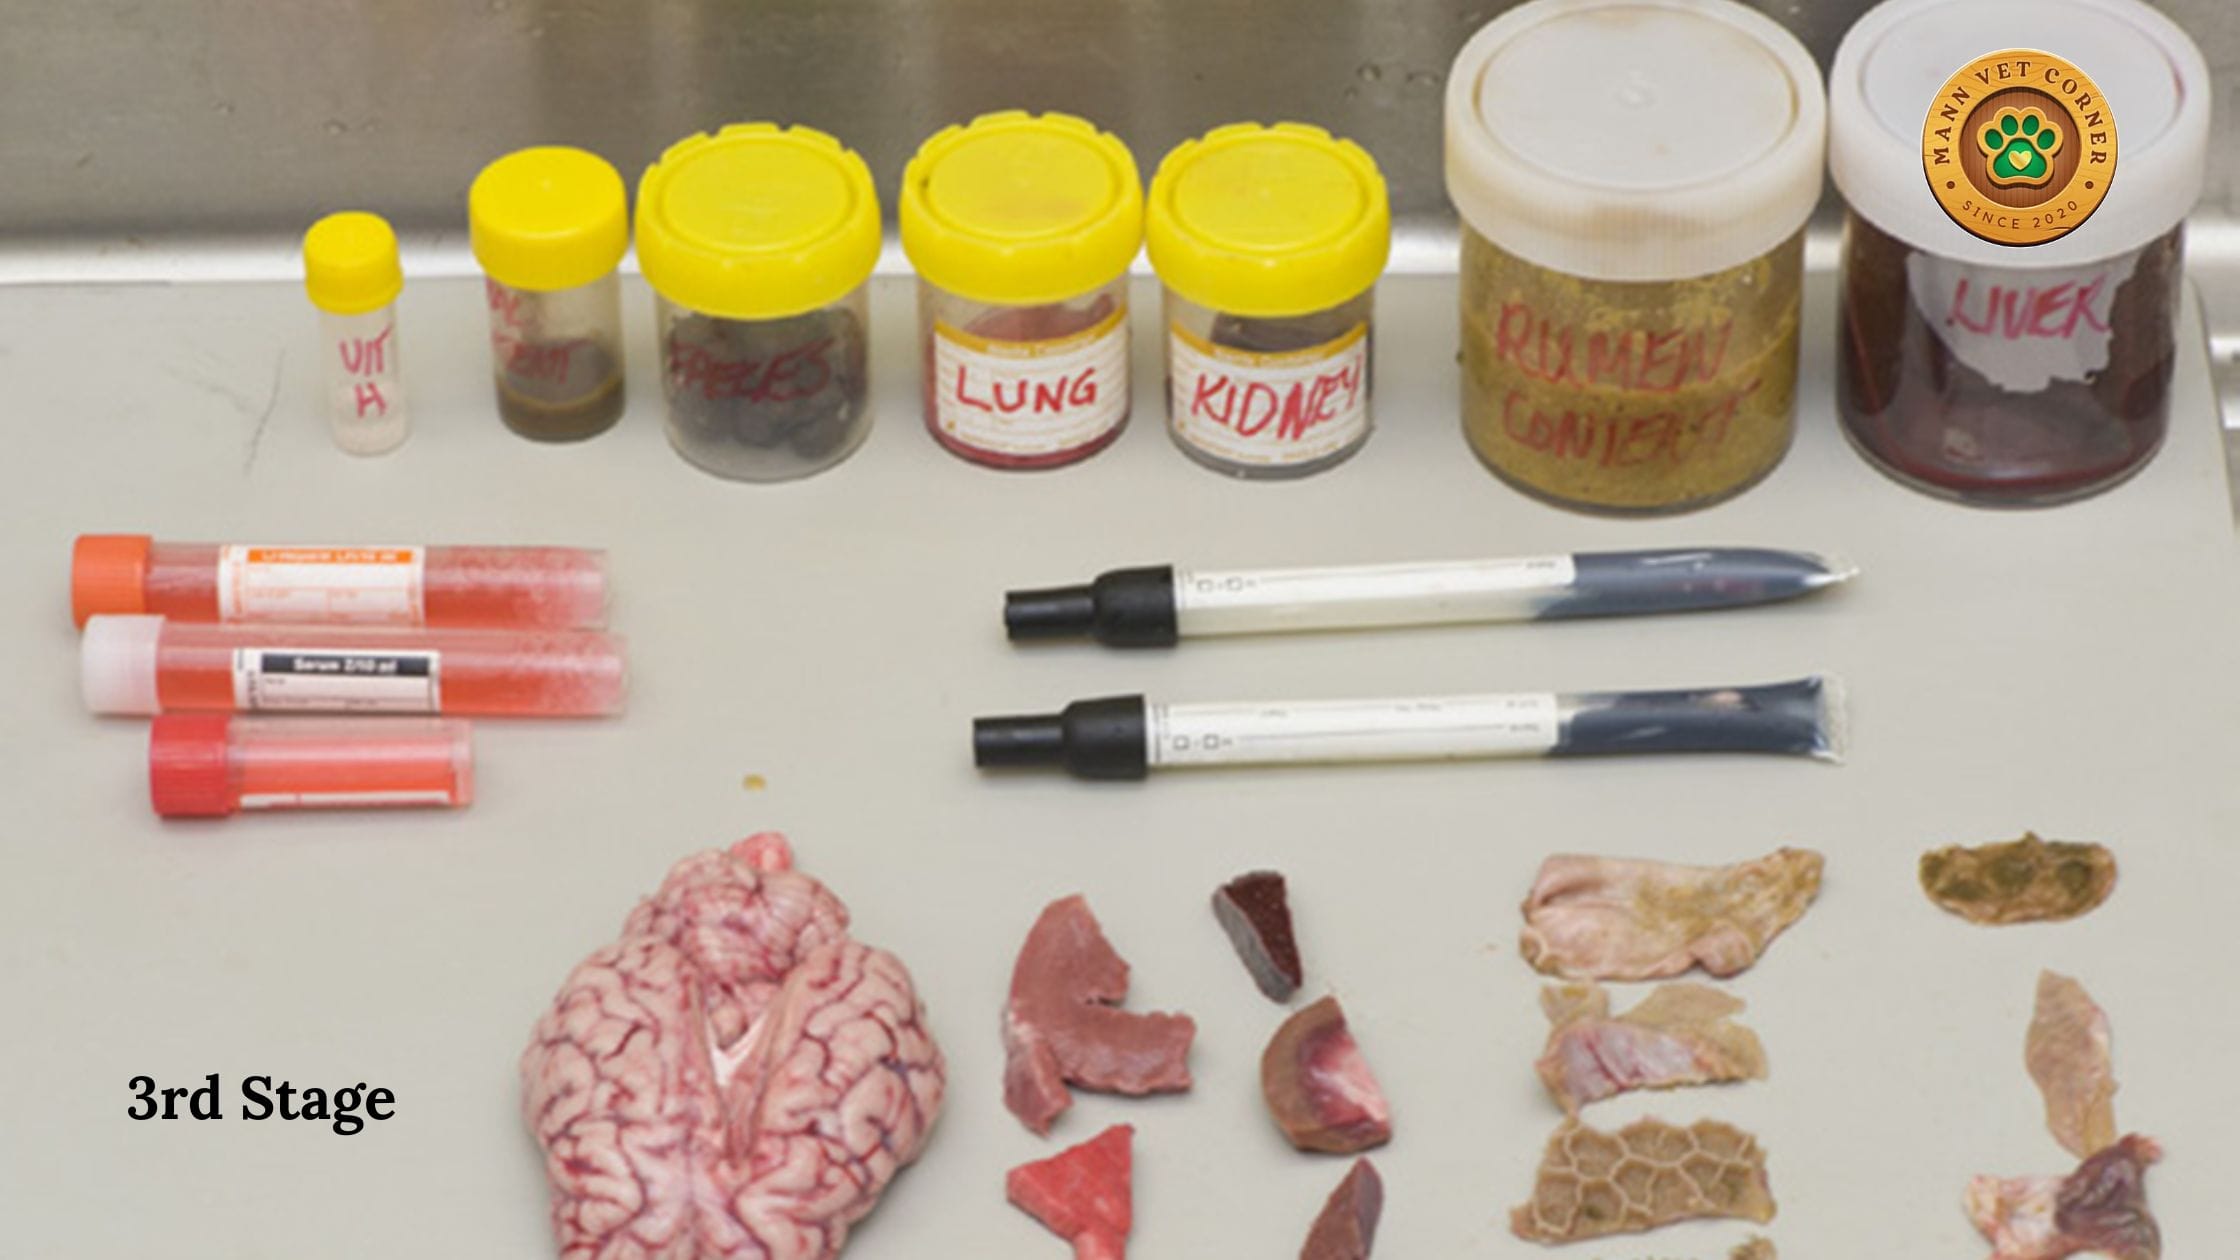
Stage 3: Handling of Collected Specimens and Submission
The third stage transforms physical tissue samples into laboratory data. No matter how thorough the gross dissection, many diagnoses require microscopic, microbiological, or chemical confirmation. Stage three bridges the gap between the necropsy table and the laboratory.
Types of Specimens Collected
Pathologists collect different types of specimens depending on the suspected cause of death and the tests they plan to order. Formalin-fixed tissue samples go to the histopathology laboratory, where technicians process, section, and stain them so a pathologist can examine the cellular architecture under a microscope. Fresh tissue samples go to the microbiology laboratory for bacterial or fungal culture. Sterile swabs from lesions, joint fluid, or body cavities allow the lab to identify specific pathogens. Blood, urine, vitreous humor, gastrointestinal contents, and liver tissue provide the toxicology laboratory with the material it needs to detect drugs, heavy metals, pesticides, and other toxic compounds. In cases where a viral disease is possible, the pathologist submits chilled or frozen tissue for virological testing or PCR analysis.
Proper Fixation of Tissue for Histopathology
Formalin fixation is the most critical step in preparing tissue for histopathology. The pathologist places tissue slices — cut to no more than 1 cm thick — into a volume of 10% neutral buffered formalin that represents at least ten times the tissue volume. Too little formalin, or tissue that the pathologist cuts too thick, produces poor fixation. Poorly fixed tissue yields slides that are difficult to interpret, and a difficult slide can mean a missed diagnosis.
The pathologist collects representative sections from every major organ, even those that appear grossly normal. Histopathology frequently reveals microscopic lesions invisible to the naked eye — early-stage tumors, subtle inflammatory changes, or intracellular parasites that gross examination simply cannot detect.
Labelling, Packaging, and Chain of Custody
Every specimen container carries a label with the animal’s identification, the organ or tissue source, the date of collection, and the pathologist’s name. In forensic necropsies — those that support criminal investigations or insurance claims — maintaining a proper chain of custody matters enormously. The pathologist documents who collected each sample, who sealed each container, and who transported the specimens to the laboratory. Any break in chain of custody can render forensic evidence inadmissible in court.
- Label every container before placing tissue inside — never after
- Fix tissue samples in 10% neutral buffered formalin at a 10:1 formalin-to-tissue ratio
- Keep fresh samples refrigerated, not frozen, unless the laboratory specifically requests frozen submission
- Submit toxicology samples in sealed, leak-proof containers to avoid cross-contamination
- Complete all submission forms with full clinical history and differential diagnoses
- Maintain chain-of-custody documentation for every forensic or insurance-related case
Communicating with the Laboratory
The submission form the pathologist sends with the specimens carries as much weight as the samples themselves. A well-written submission form tells the laboratory pathologist the signalment, the clinical history, the gross findings, and the top differential diagnoses the pathologist is considering. This context allows the laboratory to prioritize the most informative stains and tests, and it prevents the lab from issuing a generic report when a targeted one would serve the case far better.
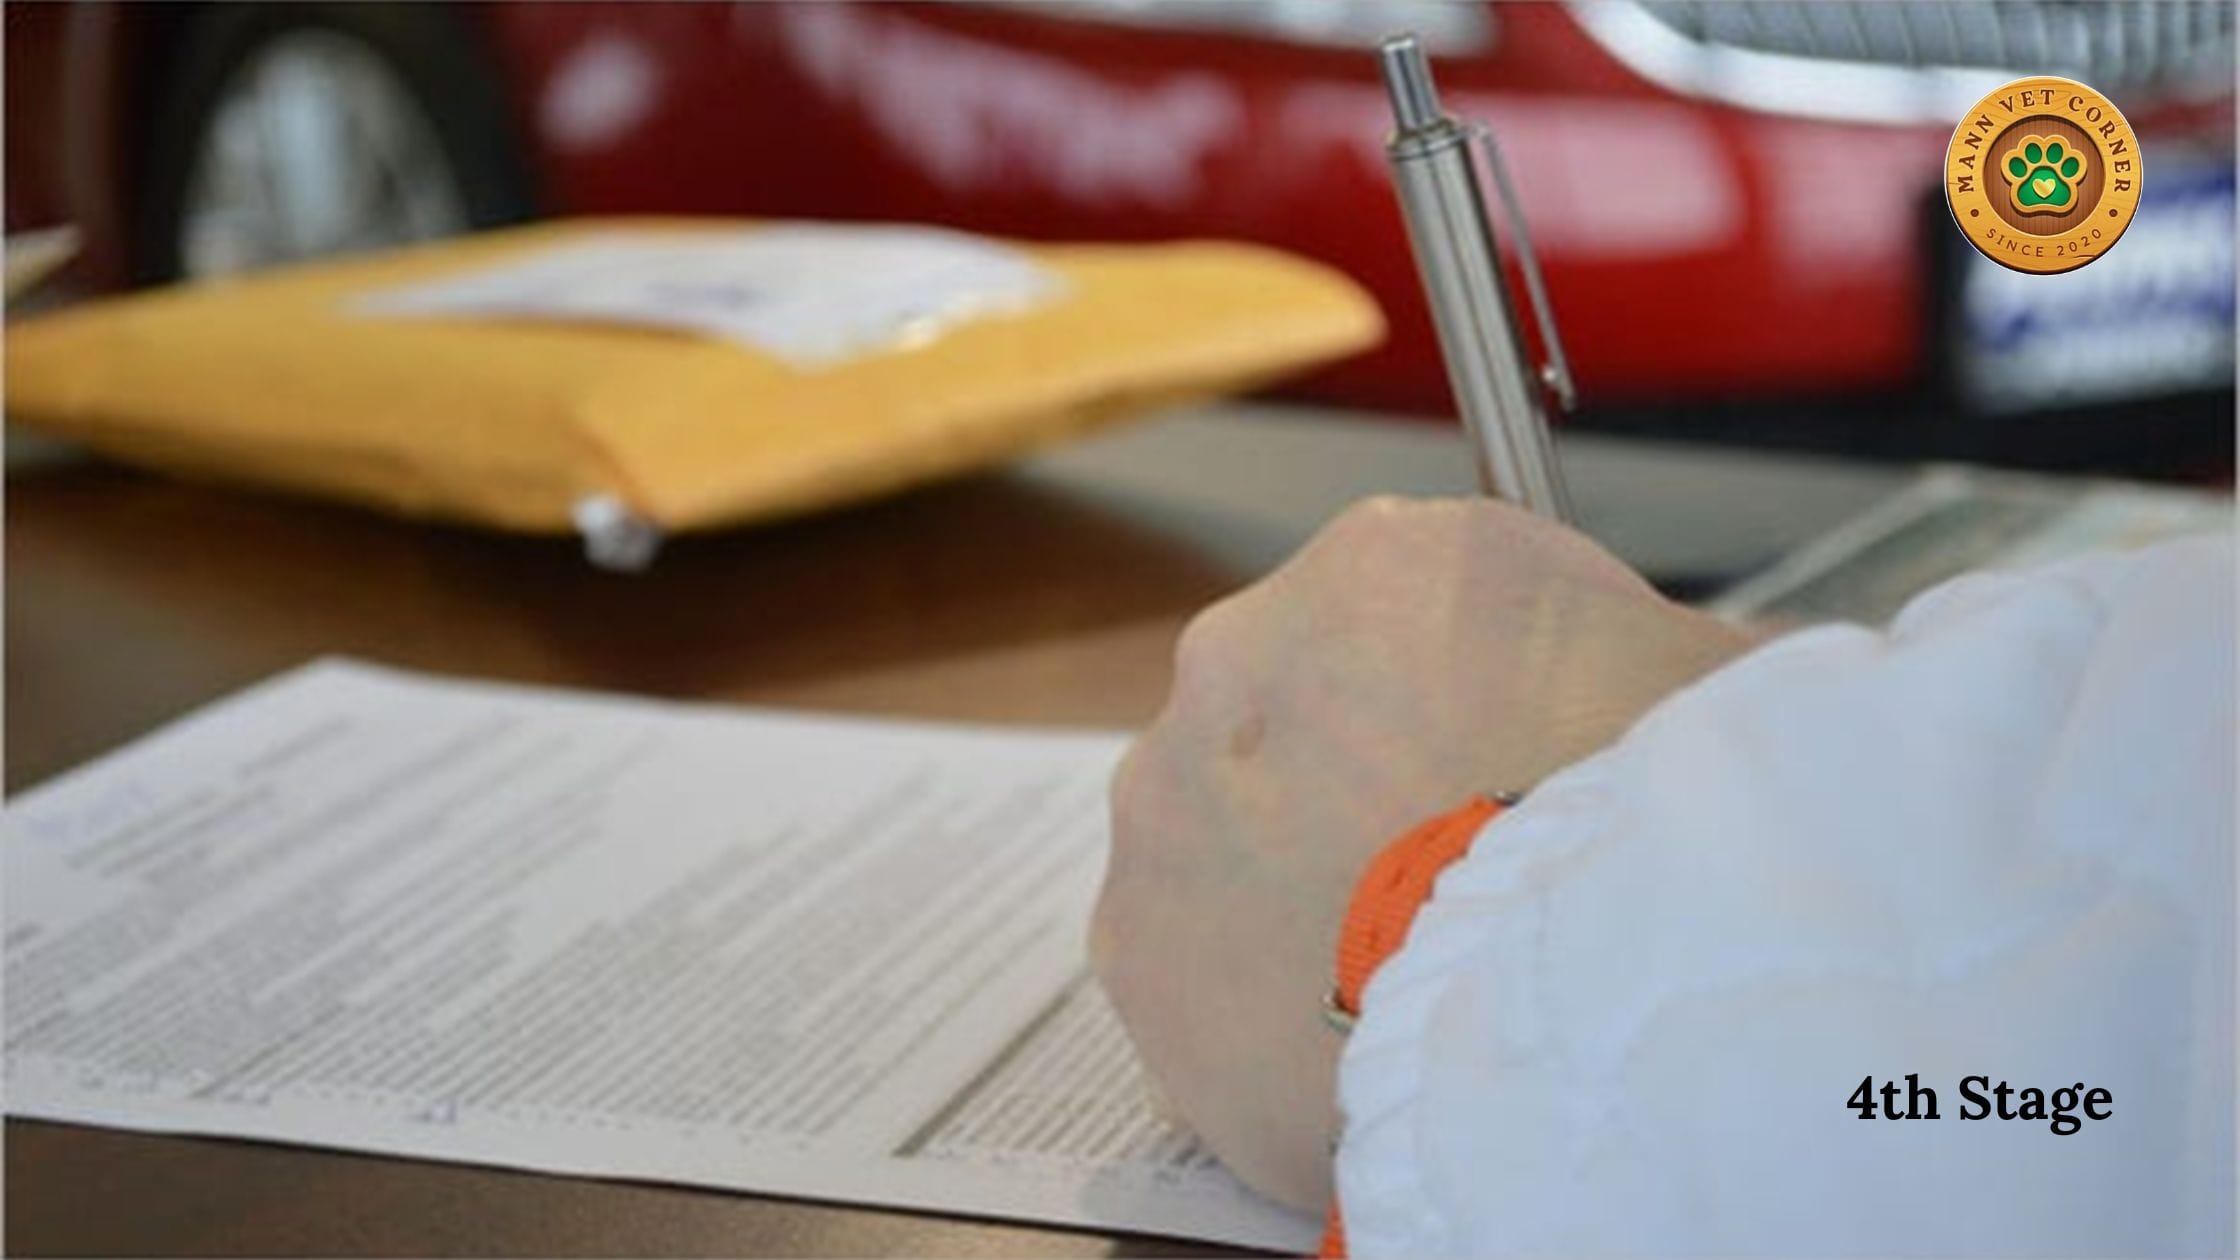
Stage 4: Writing the Necropsy Report and Conclusions
The fourth and final stage converts everything the pathologist has seen, collected, and received from the laboratory into a clear, professional, and legally credible document — the necropsy report. This report represents the ultimate deliverable of the entire process, and its quality determines whether the necropsy actually helps the people who requested it.
Structure of a Complete Necropsy Report
A well-structured necropsy report follows a consistent format that allows any reader — whether a veterinarian, an attorney, an insurance adjuster, or a grieving owner — to navigate its findings clearly. The report opens with the signalment section: the animal’s species, breed, age, sex, identification number, and the name of the owner or submitting party. The pathologist then writes a brief clinical history summarizing the presenting complaint, previous treatments, and circumstances of death.
Next comes the gross findings section, organized by body system. The pathologist describes every abnormality in precise anatomical language, moving systematically from external examination through each body cavity and organ system. Normal findings appear as brief confirmations — “no gross lesions detected” — while abnormal findings receive full descriptive detail.
The histopathology and ancillary test results section follows once the laboratory returns its data. Here, the pathologist integrates microscopic findings, culture results, and toxicology data with the gross observations, building a complete pathological picture.
The Morphological Diagnosis
Following the findings sections, the pathologist states a morphological diagnosis — a precise description of the pathological processes identified, organized from most to least significant. A morphological diagnosis sounds like this: “Severe, diffuse, necrotizing hepatitis with intralesional bacterial colonies; moderate, multifocal, hemorrhagic pneumonia; mild, diffuse, renal tubular degeneration.” This diagnosis describes what the pathologist found without yet explaining why it happened.
The Etiological Diagnosis and Cause of Death
After the morphological diagnosis, the pathologist states the etiological diagnosis — the underlying cause. Drawing on the gross findings, laboratory results, and clinical history together, the pathologist identifies the most likely cause or causes of death. When the evidence clearly points to a single answer, the pathologist states a definitive cause of death. When the evidence supports more than one possibility, the pathologist provides differential diagnoses ranked by likelihood, explaining the reasoning behind each one.
This section carries the most weight for the requesting party. It answers the core question: why did this animal die?
The Conclusions Section
The conclusions section ties everything together in plain, accessible language. Here, the pathologist steps back from technical terminology and explains what the findings mean in practical terms. Did the animal suffer from a natural disease? or a toxin cause the death? or a surgical complication contribute? Could the other animals in the household face the same risk? The pathologist addresses these questions directly, giving the owner, veterinarian, or investigator the clear guidance they need to act.
Summary: The 4 Stages of Necropsy at a Glance
Why Every Stage of Necropsy Matters Equally
Each of the four necropsy stages depends on the quality of the one before it. Pre-dissection preparation shapes how the pathologist interprets gross findings. Gross dissection determines which specimens go to the laboratory. Proper specimen handling determines whether laboratory results return accurately. And the necropsy report determines whether any of it translates into useful action for the people who needed answers.
A necropsy that rushes stage one produces a pathologist who misreads lesions without context. It also handles specimens carelessly in stage three produces laboratory reports that contradict or fail to explain the gross findings. In stage four of necropsy as an afterthought produces a report so vague it answers nothing. Each stage deserves the same level of care, precision, and professional rigor.
This four-stage framework also explains why a good necropsy takes time. Pet owners sometimes wonder why they must wait days or weeks for a final necropsy report. The answer lies here: the pathologist completes stage two on the day of examination, but stages three and four require laboratory turnaround time, data integration, and careful writing. Rushing a report to meet an arbitrary deadline serves no one — least of all the animal whose death the examination exists to explain.
Necropsy Stages Across Different Species
While the four-stage framework applies to every species, the specific techniques within each stage vary considerably between animal types. A necropsy on a horse requires a different dissection sequence than a necropsy on a chicken. A fish necropsy calls for different fixation protocols than a dog necropsy. Reptile necropsies demand special attention to ectothermic physiology and post-mortem change rates, which differ markedly from mammals.
Veterinary pathologists who specialize in specific species — avian pathology, aquatic animal pathology, or wildlife pathology — develop refined techniques for each group. Academic and diagnostic laboratories that serve multiple species maintain written protocols tailored to each animal class, ensuring consistent quality across all cases regardless of the species on the table.
Frequently Asked Questions
Q: How many stages does a complete necropsy have?
A complete necropsy consists of four stages: pre-dissection preparation, gross necropsy dissection, handling of collected specimens, and writing the necropsy report and conclusions. Most people only see or know about the gross dissection stage, but all four stages carry equal diagnostic importance.
Q: What happens during the gross dissection stage of a necropsy?
During gross dissection, the veterinary pathologist systematically opens the carcass and examines every body system — skin, musculature, abdominal organs, thoracic organs, head, and spinal cord. They record and photograph every abnormal finding in detail, using precise descriptive language to capture the location, color, size, distribution, and consistency of each lesion.
Q: What is pre-dissection preparation in necropsy?
Pre-dissection preparation is the first stage of the necropsy process. The pathologist reviews the animal’s clinical history, prepares instruments and PPE, performs an external examination of the intact carcass, and creates a photographic record — all before making a single incision. This stage sets the context for every finding the dissection reveals.
Q: What specimens do pathologists collect during a necropsy?
Pathologists typically collect formalin-fixed tissues for histopathology, fresh tissue or swabs for microbiology and culture, blood or body fluids for toxicology, and chilled or frozen samples for virology or PCR testing. The specific specimens depend on the suspected diagnosis and the tests the submitting veterinarian requests.
About the Necropsy Report
Q: What does a necropsy report include?
A complete necropsy report includes the animal’s signalment and clinical history, a body-system-by-body-system description of gross findings, ancillary laboratory results, a morphological diagnosis describing the pathological processes found, an etiological diagnosis stating the cause of death, and a conclusions section that explains the findings in practical terms for the requesting party.
Q: How long does a complete necropsy take including all four stages?
The gross dissection (stage two) typically takes two to four hours. However, the complete necropsy process — including laboratory turnaround time for histopathology, microbiology, and toxicology — often takes one to three weeks from the date of examination. The final report (stage four) follows only after the pathologist receives and integrates all laboratory results.
Q: Can a necropsy happen at home or does it require a laboratory facility?
Veterinarians sometimes perform field necropsies — particularly for large animals like horses or cattle — at the farm or location of death. However, proper specimen collection, fixation, and submission still follow the same protocols. Laboratory necropsies at a veterinary diagnostic laboratory offer a more controlled environment, better equipment, and faster access to ancillary testing, which produces more complete results.
Final Thoughts: The Four Stages Work as One
Necropsy earns its reputation as the gold standard of post-mortem diagnosis not because of any single dramatic moment of dissection, but because of the disciplined, four-stage process that surrounds it. Preparation before the first incision. Systematic dissection with careful documentation. Proper specimen handling that ensures laboratory results are reliable. And a precise, well-reasoned report that turns all those findings into answers.