

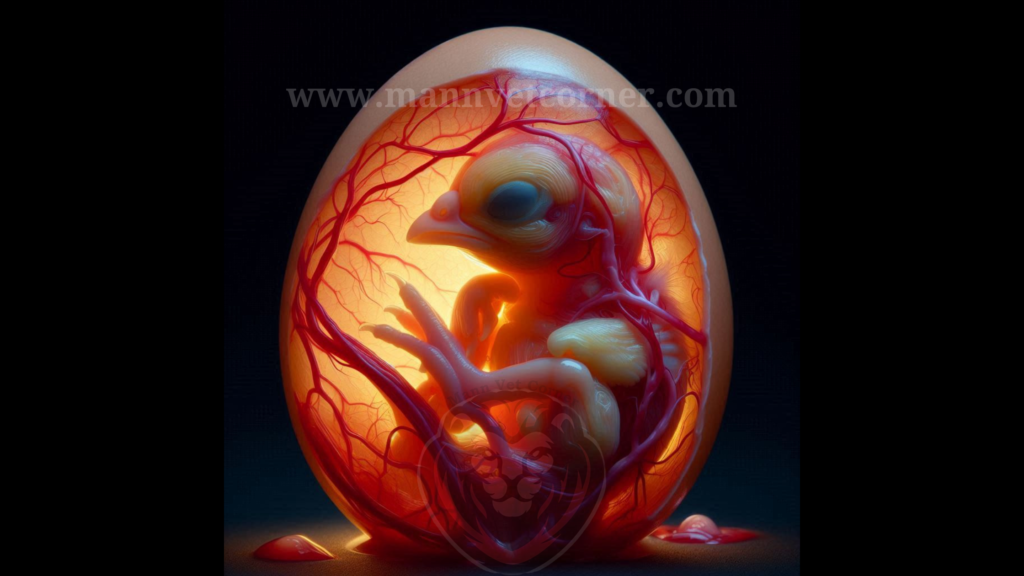
What is Chicken Egg Candling?
Candling chicken eggs is a vital technique that’s widely used by poultry farmers and hatcheries to evaluate egg quality and the development of embryos. This procedure is taken through bright light through the egg to expose its internal structure, assessing fertility by the presence of blood veins, embryonic development, and general egg viability. Through chicken egg candling, quickly detect unfertile egg’s issues, ensuring that only healthy eggs proceed with incubation and remove the infertile eggs from the hatchery. Moreover, this method aids in identifying non-viable eggs, thus avoiding egg contamination of healthy eggs in the hatchery. In the end, chicken egg candling plays a crucial role in improving hatch rates and supporting strong chicken breeds for sustainable egg production.
Why is Egg Candling Important?
Egg candling plays a crucial role in hatcheries and poultry farms. The key benefits include:
- Detecting Fertility – Determines if an egg is fertilized or unfertilized.
- Monitoring Embryo Development – Ensures the embryo is growing healthily.
- Identifying Non-Viable Eggs – Prevents bad eggs from contaminating others.
- Checking Eggshell Quality – Helps detect cracks or abnormalities in the shell.
- Improving Hatch Rates – Allows farmers to remove unproductive eggs early.
Best Time to Candle Chicken Eggs
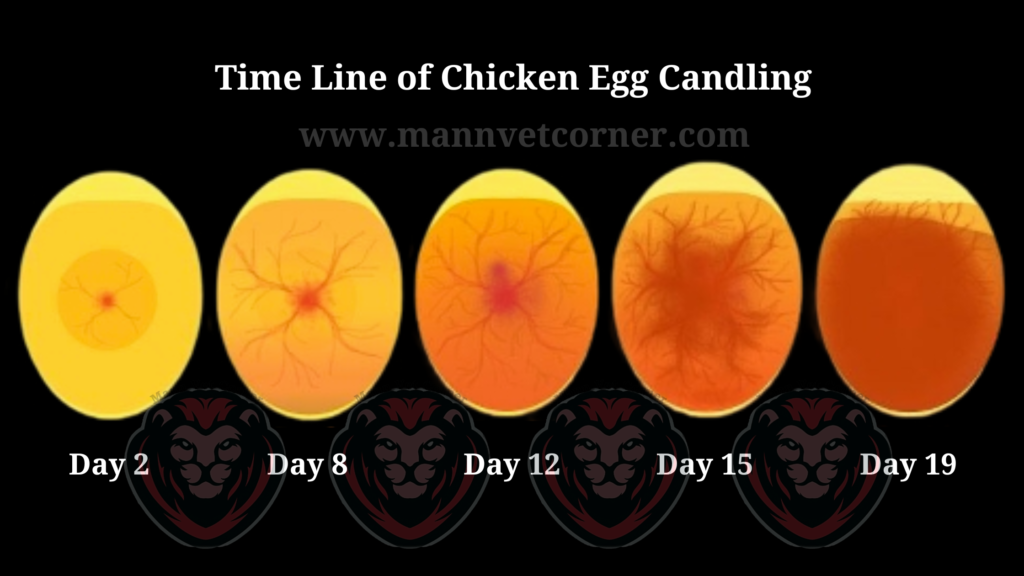
Candling should be done at strategic intervals during incubation to track embryo development. The recommended candling days are:
- Day 1-3 – Difficult to see any changes, but initial development may be visible.
- Day 7 – Clear veins should be present in fertilized eggs.
- Day 10 – A moving embryo and a distinct air cell should be visible.
- Day 14 – The chick fills more space, making details harder to see.
- Day 18-21 – The chick is fully developed, and the air cell is prominent.
How to Perform Egg Candling
Step 1: Prepare the Equipment
To candle eggs effectively, you will need:
- A bright LED flashlight or a specialized egg candler
- A dark room to enhance visibility
- A stable surface to hold the egg securely
- Clean hands to avoid contaminating the egg
Step 2: Position the Egg Correctly
Hold the egg with its large end up (where the air cell is located). Position the light directly under or behind the egg to illuminate its interior.
Step 3: Observe the Internal Structures
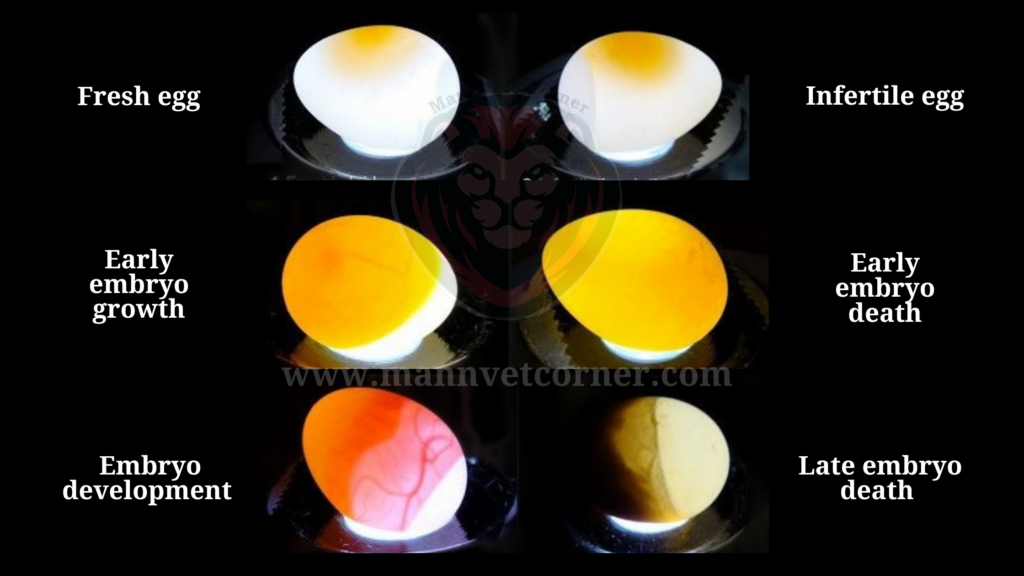
When light passes through the egg, look for:
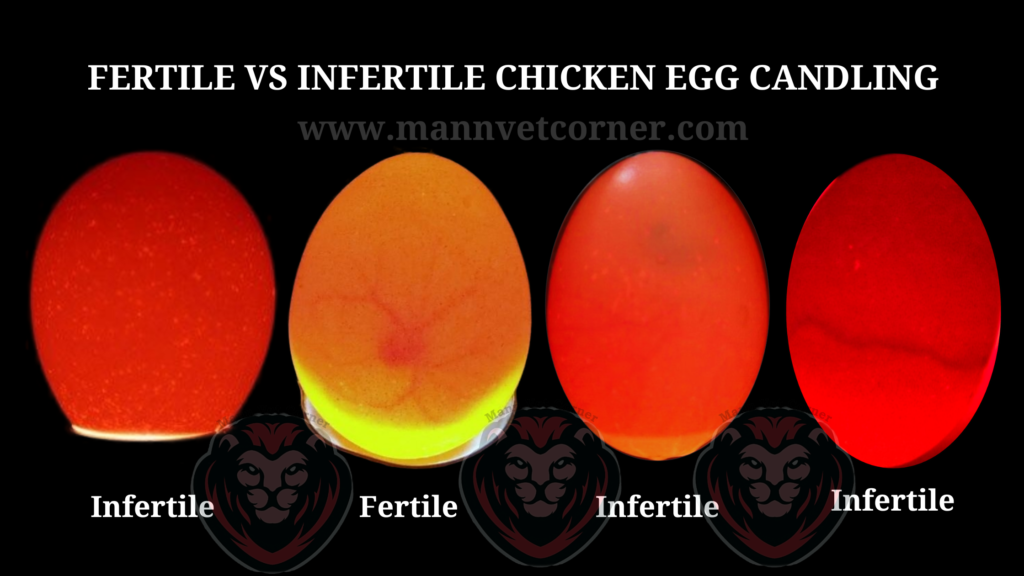
- Veins and Embryo Movement – Indicates a healthy, fertilized egg.
- Blood Ring – A red circular line inside the egg signals embryo death.
- Clear Egg – No visible development suggests the egg is infertile.
- Dark Mass with Air Cell – A nearly developed chick in late incubation stages.
Step 4: Remove Non-Viable Eggs
If you detect any dead or infertile eggs, remove them to prevent contamination and optimize hatch rates.
Identifying Good vs. Bad Eggs During Candling
| Feature | Healthy Egg | Non-Viable Egg |
|---|---|---|
| Veins Present | Yes, clearly visible | No veins or faded |
| Embryo Movement | Active and responsive | No movement |
| Air Cell Size | Grows as incubation progresses | Too large or too small |
| Blood Ring | None | Present (dead embryo) |
| Dark Spots | Clear chick formation | Unclear or moldy |
Common Mistakes in Egg Candling
Even experienced poultry farmers can make mistakes when candling eggs. Here are the most common errors to avoid:
- Candling Too Early or Too Late – Wait at least 7 days for clear embryo development.
- Using a Weak Light Source – A dim flashlight may not show details clearly.
- Handling Eggs Roughly – Always hold eggs gently to prevent damage.
- Over-Candling – Frequent candling may disturb the embryo’s development.
- Ignoring Temperature & Humidity – Environmental factors play a crucial role in successful hatching.
Alternative Methods to Candling
While candling is the most common method, there are other techniques to assess egg viability:
- Floating Test – Placing an egg in water to see if it floats (not recommended for incubating eggs).
- Egg Weighing – Monitoring weight loss throughout incubation.
- Infrared Imaging – Advanced technology to assess internal structures without direct light exposure.
Frequently Asked Questions (FAQs)
- Can I candle brown eggs? Yes, but brown eggs require a stronger light source due to their thicker shells.
- How often should I candle eggs? It is best to candle 2-3 times during incubation: Day 7, Day 14, and Day 18.
- What if I see a moving embryo but no veins? The egg may still be viable. Check again after 24 hours to confirm growth.
- Can I candle eggs after Day 18? It is not recommended as the embryo is fully developed and could be disturbed.
- What happens if I leave bad eggs in the incubator? They may rot, leak, or even explode, contaminating the healthy eggs.
Conclusion
Egg candling is an essential practice for poultry farmers to maximize hatch rates and ensure healthy chick development. By following proper candling techniques, using the right equipment, and understanding egg viability signs, farmers can improve their hatching success significantly. Regular candling at key incubation stages helps identify non-viable eggs early, preventing contamination and promoting a higher yield of healthy chicks.
